Programming a Homelink® System with a Genie Remote
Posted by Charlene Pepiot on 2nd Nov 2023
Adding a Genie garage door opener remote to a HomeLink system requires a different process than regular remotes. Follow North Shore Commercial Door’s handy step-by-step guide to learn how to quickly program your Genie remote to a HomeLink system.
Is Genie a Good Brand?
Genie is a trusted garage door manufacturer that has been in business for decades! The company takes pride in being an industry leader in innovative technology, from creating the first mass-produced, radio-controlled residential garage door opener in the 50s, to the smart home technology the company continues to improve upon today. If you’re interested in purchasing a Genie operator or are curious about how your current model ranks with other models, you can check out our handy Genie Garage Door Openers Comparison Guide Chart!
What is HomeLink?
HomeLink is the most widely used vehicle-based wireless control system in the world. With just three buttons in your car, you can open and shut your garage door and front gate, activate and deactivate your home’s security system, and turn your interior or exterior lighting on or off alongside appliances and electronics.
What Garage Door Brands Work with HomeLink?
HomeLink is compatible with over 99% of garage door and gate opening systems. These include some of the nation’s most popular brands, including LiftMaster and Genie garage openers! To program your HomeLink system, follow the steps below.
Programming Instructions for Homelink® System with Genie Remotes
Step 1 Clear HomeLink
To program your HomeLink system to a Genie remote, first clear HomeLink by pressing and holding down the first and third buttons until the indicator light on the system has a slow blink that turns fast for 20 seconds. Release both buttons.
PLEASE NOTE: Clearing the HomeLink will remove all previously programmed garage door openers.
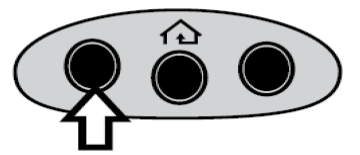
Step 2 Train HomeLink to the Genie Remote
Next, choose which button on the HomeLink will be used to open the door. Hold the Genie Remote two inches from the HomeLink button, then hold down the Genie transmitter button. While holding, press and hold the chosen HomeLink button. Hold down both buttons until the HomeLink indicator light blinks slow then fast. Once the light flashes, release each button.

Step 3 Program HomeLink to the Genie Opener
Press and hold the “PRGRM SET” button on the opener until the round blue LED light is ON. Release the button. The long LED will flash purple.

Press the chosen HomeLink button for two seconds and release. Press that same button again for two seconds and release. The long LED at the powerhead will flash blue and then turn off.
Press the HomeLink button a few more times until the overhead door moves. The setup is now complete!
For additional instructions, see your motor vehicle’s owner manual or visit www.homelink.com or www.homelink.com
Go Further with Genie!
Once your HomeLink system is linked to a Genie remote, be sure to take your garage to greater heights by shopping Genie’s line of garage accessories. Also, stay on top of your garage’s potential issues as components wear out by reading our Guide to Garage Door Maintenance!
Still Curious About HomeLink and Genie?
Please ask! Our in-house experts can help you with all of your HomeLink and Genie door questions. Get in touch with our support crew:
- Live chat: Click the green "Contact Us" button on the right
- Call: 800-783-6112
- Email: support@northshorecommercialdoor.com