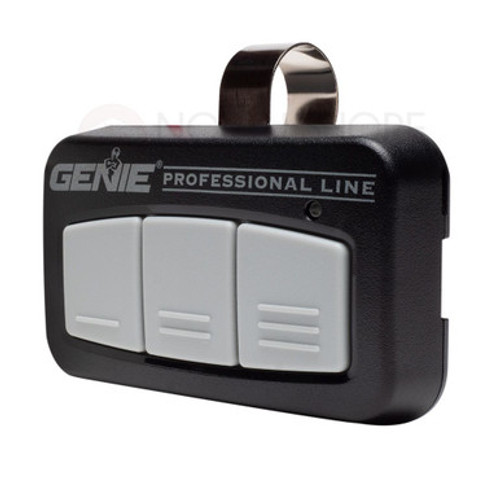
- Premium private-community gate/garage transmitter has 12-DIP switch easy-program security and embedded button-panel LED illumination
- Usually Ships Following Business Day
Genie
Genie GM3T-BX Genie Master Universal Garage Door Remote
- Premium private-community gate/garage transmitter has 12-DIP switch easy-program security and embedded button-panel LED illumination
- Usually Ships Following Business Day
- UPC:
- 50049017613
- atc-product:
- 41538T
- atc-product:
- 38501R
- atc-product:
- GK-BX
- atc-product:
- G3T-BX
- atc-product:
- GUK-BX
- availability:
- available
The Genie GM3T-BX Genie Master Universal Garage Door Remote from North Shore Commercial Door is convenient because it fits all your remotes into one. It works with Genie gated community receivers. If you have any questions, the Q&A section on the website can help.
•Works with all Genie gated community receivers
•Works with Genie 9 switch and 12 switch units
•IntelliCode 1 compatible
•IntelliCode 2 compatible
•ACSGT, ACSCTG Type 1, ACSGT Type 1, TBSTG Type 1
•Series II Electronics Compatible Remote, B8QACSC
•Auto seek dual frequency 315/390 MHz
•Large, easy to find buttons for activation
•LED indicators
•User can define functionality of each button
•Simple programming for all modes
•Easily mounts to car visor
Remote Specifications:
•Model GM3T
•Part number 37344R
•Dimensions: 3-3/8" L x 1-15/16" W x 1/2" D
• Coin cell battery: CR2032
•FCC certified
•Visor clip and instructions included
DIMENSIONS:- LENGTH: 3-1/4 INCHES
- WIDTH: 1-7/8 INCHES
- DEPTH: 3/4 INCHES
For use with Intellicode® 1 Openers:
- Locate the Learn Code button and the indicator LED on the powerhead.
- Press & release the Learn Code Button (the LED will blink rapidly)
- Press & release the Learn Code Button (the LED will stop blinking)
- Press & release the Remote Button again (the LED will go out)
- Press the Remote Button one last time and release. The Door Opener will now run.
Note: When in Intellicode® 2 Operating Mode, the LED should be green.
How to shift to Intellicode® 2 mode:
- Hold down the Remote button (red LED) until the green light also illuminates and then release.
- Press & release the Remote button again twice and both lights will turn off.
- Press & release the Remote button one last time. The green LED will now be on.
- Hold down the Program/Set button until the LED turns blue. Upon release the light will change to purple.
- Press & release the Remote button you wish to assign.
- Press & release the Remote button again (both LEDs will be off)
- Press that same button one last time and release. The Door Opener will now run.
How to operate a Code Switch equipped operator:
- Locate the Code Switches by opening the light lens.
- Remove the rear cover.
- Match the Code Switches to the switches in the opener.
- Find the non-rolling button label inside the rear cover. Press either B, C or D (whichever matches the relative description on the label) and the yellow battery LED will flash.
- Press & release the Remote button you wish to assign. (the green LED will flash)
- Press the Remote button one last time release. The red LED will flash while the button is held down.
 How to Replace the Battery:
- Remove circuit board cover.
- Slide the old battery downwards toward the bottom of the remote.
- Dispose of old battery correctly.
- Slide in the new battery and replace the cover.
- Remove the circuit board cover.
- Press the Default button.
- Press the Remote button you want to reset and return to Intellicode® 1 mode.


